FunASR 部署及使用
FunASR 是一个基础语音识别工具包,提供多种功能,包括语音识别(ASR)、语音端点检测(VAD)、标点恢复、语言模型、说话人验证、说话人分离和多人对话语音识别等。
一、环境准备
1,项目地址
https://github.com/modelscope/FunASR
2,conda环境
conda create -n FunASR python=3.10
conda activate FunASR
3,安装 torch
pip install torch torchaudio
# 环境需求
python>=3.8
torch>=1.13
torchaudio
二、安装部署
1,pip方式安装
pip3 install -U funasr2,源码下载
git clone https://github.com/modelscope/FunASR.git
cd FunASR
pip3 install -e ./
安装 modelscope 或 huggingface_hub 以获取预训练模型(可选)
pip3 install -U modelscope huggingface_hub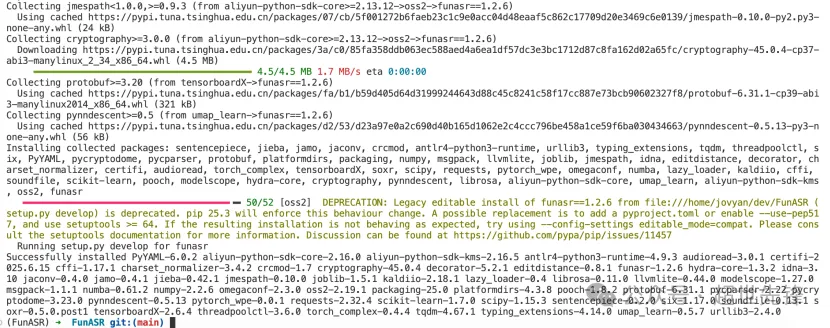
3,命令行使用测试
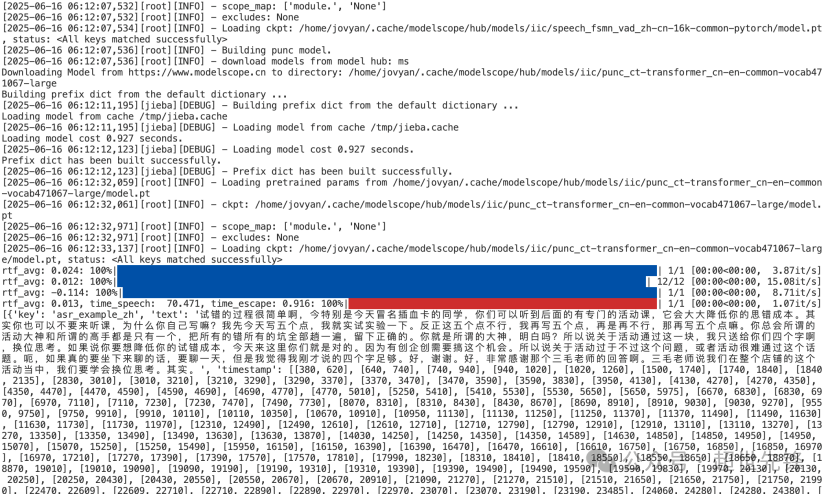
funasr ++model=paraformer-zh ++vad_model="fsmn-vad" ++punc_model="ct-punc" ++input=asr_example_zh.wav注:支持单条音频文件识别,也支持文件列表,列表为kaldi风格 wav.scp:wav_id wav_path

四、代码使用测试
1,AutoModel 定义
model = AutoModel(model=[str], device=[str], ncpu=[int], output_dir=[str], batch_size=[int], hub=[str], **kwargs)参数说明:
- model(str): 模型仓库 中的模型名称,或本地磁盘中的模型路径
- device(str): cuda:0(默认gpu0),使用 GPU 进行推理,指定。如果为cpu,则使用 CPU 进行推理。mps:mac电脑M系列新品试用mps进行推理。xpu:使用英特尔gpu进行推理。
- ncpu(int): 4 (默认),设置用于 CPU 内部操作并行性的线程数
- output_dir(str): None (默认),如果设置,输出结果的输出路径
- batch_size(int): 1 (默认),解码时的批处理,样本个数
- hub(str):ms(默认),从modelscope下载模型。如果为hf,从huggingface下载模型。
- kwargs(dict): 所有在config.yaml中参数,均可以直接在此处指定,例如,vad模型中最大切割长度 max_single_segment_time=6000 (毫秒)。
2,非实时语音识别
SenseVoiceSmall 模型
vi test_code_02.py
from funasr import AutoModel
from funasr.utils.postprocess_utils import rich_transcription_postprocess
model_dir = "iic/SenseVoiceSmall"
model = AutoModel(
    model=model_dir,
    vad_model="fsmn-vad",
    vad_kwargs={"max_single_segment_time": 30000},
    device="cuda:0",
)
# en
res = model.generate(
    input=f"{model.model_path}/example/en.mp3",
    cache={},
    language="auto",  # "zn", "en", "yue", "ja", "ko", "nospeech"
    use_itn=True,
    batch_size_s=60,
    merge_vad=True,  #
    merge_length_s=15,
)
text = rich_transcription_postprocess(res[0]["text"])
print(text)参数说明:
- model_dir:模型名称,或本地磁盘中的模型路径。
- vad_model:表示开启VAD,VAD的作用是将长音频切割成短音频,此时推理耗时包括了VAD与SenseVoice总耗时,为链路耗时,如果需要单独测试SenseVoice模型耗时,可以关闭VAD模型。
- vad_kwargs:表示VAD模型配置,max_single_segment_time: 表示vad_model最大切割音频时长, 单位是毫秒ms。
- use_itn:输出结果中是否包含标点与逆文本正则化。
- batch_size_s 表示采用动态batch,batch中总音频时长,单位为秒s。
- merge_vad:是否将 vad 模型切割的短音频碎片合成,合并后长度为merge_length_s,单位为秒s。
- ban_emo_unk:禁用emo_unk标签,禁用后所有的句子都会被赋予情感标签。

Paraformer模型
vi test_code_03.py
from funasr import AutoModel
# paraformer-zh is a multi-functional asr model
# use vad, punc, spk or not as you need
model = AutoModel(model="paraformer-zh",  vad_model="fsmn-vad", punc_model="ct-punc",
                  # spk_model="cam++"
                  )
res = model.generate(input=f"{model.model_path}/example/asr_example.wav",
            batch_size_s=300,
            hotword='魔搭')
print(res)
注:hub:表示模型仓库,ms为选择modelscope下载,hf为选择huggingface下载。

3,实时语音识别
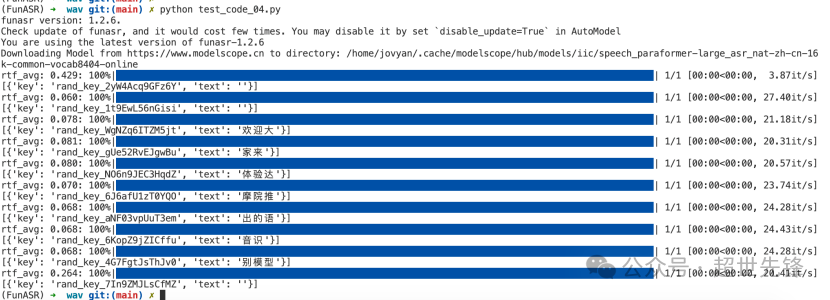
vi test_code_04.py
from funasr import AutoModel
chunk_size = [0, 10, 5] #[0, 10, 5] 600ms, [0, 8, 4] 480ms
encoder_chunk_look_back = 4 #number of chunks to lookback for encoder self-attention
decoder_chunk_look_back = 1 #number of encoder chunks to lookback for decoder cross-attention
model = AutoModel(model="paraformer-zh-streaming")
import soundfile
import os
wav_file = os.path.join(model.model_path, "example/asr_example.wav")
speech, sample_rate = soundfile.read(wav_file)
chunk_stride = chunk_size[1] * 960 # 600ms
cache = {}
total_chunk_num = int(len((speech)-1)/chunk_stride+1)
for i in range(total_chunk_num):
    speech_chunk = speech[i*chunk_stride:(i+1)*chunk_stride]
    is_final = i == total_chunk_num - 1
    res = model.generate(input=speech_chunk, cache=cache, is_final=is_final, chunk_size=chunk_size, encoder_chunk_look_back=encoder_chunk_look_back, decoder_chunk_look_back=decoder_chunk_look_back)
    print(res)
注:
chunk_size为流式延时配置,[0,10,5]表示上屏实时出字粒度为1060=600ms,未来信息为560=300ms。每次推理输入为600ms(采样点数为16000*0.6=960),输出为对应文字,最后一个语音片段输入需要设置is_final=True来强制输出最后一个字。
4,语音端点检测(非实时)
vi test_code_05.py
from funasr import AutoModel
model = AutoModel(model="fsmn-vad")
wav_file = f"{model.model_path}/example/vad_example.wav"
res = model.generate(input=wav_file)
print(res)
注:VAD模型输出格式为:[[beg1, end1], [beg2, end2], .., [begN, endN]],其中begN/endN表示第N个有效音频片段的起始点/结束点, 单位为毫秒。

5,语音端点检测(实时)
vi test_code_06.py
from funasr import AutoModel
chunk_size = 200 # ms
model = AutoModel(model="fsmn-vad")
import soundfile
wav_file = f"{model.model_path}/example/vad_example.wav"
speech, sample_rate = soundfile.read(wav_file)
chunk_stride = int(chunk_size * sample_rate / 1000)
cache = {}
total_chunk_num = int(len((speech)-1)/chunk_stride+1)
for i in range(total_chunk_num):
    speech_chunk = speech[i*chunk_stride:(i+1)*chunk_stride]
    is_final = i == total_chunk_num - 1
    res = model.generate(input=speech_chunk, cache=cache, is_final=is_final, chunk_size=chunk_size)
    if len(res[0]["value"]):
        print(res)
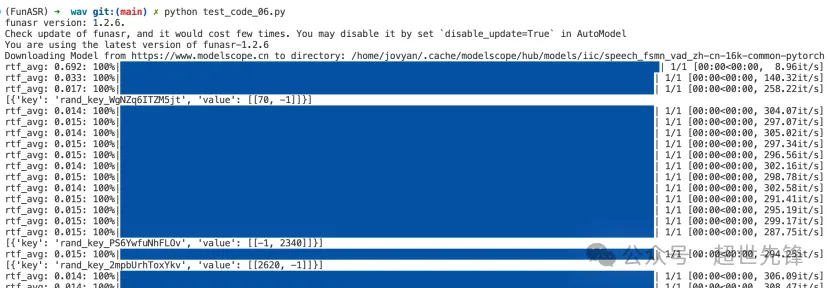
注:流式VAD模型输出格式为4种情况:
- [[beg1, end1], [beg2, end2], .., [begN, endN]]:同上离线VAD输出结果。
- [[beg, -1]]:表示只检测到起始点。
- [[-1, end]]:表示只检测到结束点。
- []:表示既没有检测到起始点,也没有检测到结束点 输出结果单位为毫秒,从起始点开始的绝对时间。

6,标点恢复
vi test_code_07.py
from funasr import AutoModel
model = AutoModel(model="ct-punc")
res = model.generate(input="那今天的会就到这里吧 happy new year 明年见")
print(res)
7,时间戳预测
vi test_code_08.py
from funasr import AutoModel
model = AutoModel(model="fa-zh")
wav_file = f"{model.model_path}/example/asr_example.wav"
text_file = f"{model.model_path}/example/text.txt"
res = model.generate(input=(wav_file, text_file), data_type=("sound", "text"))
print(res)
8,情感识别
vi test_code_09.py
from funasr import AutoModel
model = AutoModel(model="emotion2vec_plus_large")
wav_file = f"{model.model_path}/example/test.wav"
res = model.generate(wav_file, output_dir="./outputs", granularity="utterance", extract_embedding=False)
print(res)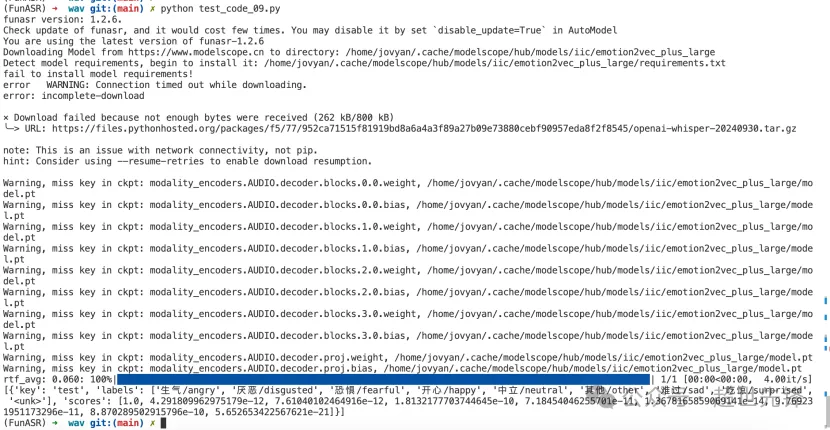
五、问题总结
- 问题1:torch模块缺失

解决:重新安装torch、torchaudio模块pip install torch torchaudio
作者:Ddd4j 创建时间:2025-08-04 22:22
最后编辑:Ddd4j 更新时间:2026-01-22 19:14
最后编辑:Ddd4j 更新时间:2026-01-22 19:14
