InfluxDB 最新版本是 v2.x . 官方最新开源版本不支持集群,如果是单机部署则考虑最新的开源版本。
安装 InfluxDB
Ubuntu & Debian 使用 “apt-get” 安装
添加influxdb官方apt源:
# influxdata-archive_compat.key GPG Fingerprint: 9D539D90D3328DC7D6C8D3B9D8FF8E1F7DF8B07E
wget -q https://repos.influxdata.com/influxdata-archive_compat.key
echo '393e8779c89ac8d958f81f942f9ad7fb82a25e133faddaf92e15b16e6ac9ce4c influxdata-archive_compat.key' | sha256sum -c && cat influxdata-archive_compat.key | gpg --dearmor | sudo tee /etc/apt/trusted.gpg.d/influxdata-archive_compat.gpg > /dev/null
echo 'deb [signed-by=/etc/apt/trusted.gpg.d/influxdata-archive_compat.gpg] https://repos.influxdata.com/debian stable main' | sudo tee /etc/apt/sources.list.d/influxdata.list
然后,安装并启动 InfluxDB 服务:
sudo apt-get update && sudo apt-get install influxdb
sudo service influxdb start
或者,如果您的操作系统使用的是 systemd(Ubuntu 15.04+、Debian 8+):
sudo apt-get update && sudo apt-get install influxdb
sudo systemctl unmask influxdb.service
sudo systemctl start influxdb
Red Hat && CentOS 使用 “yum” 安装
Red Hat 和 CentOS 用户可以使用yum包管理器安装最新稳定版本的 InfluxDB
cat <<EOF | sudo tee /etc/yum.repos.d/influxdb.repo
[influxdb]
name = InfluxDB Repository - RHEL \$releasever
baseurl = https://repos.influxdata.com/rhel/\$releasever/\$basearch/stable
enabled = 1
gpgcheck = 1
gpgkey = https://repos.influxdata.com/influxdata-archive_compat.key
EOF将存储库添加到yum配置后,通过运行以下命令安装并启动 InfluxDB 服务:
sudo yum install influxdb
sudo service influxdb start
或者,如果您的操作系统使用的是 systemd(CentOS 7+、RHEL 7+):
sudo yum install influxdb
sudo systemctl start influxdb
SLES & openSUSE 使用 “zypper” 安装
openSUSE Build Service 为 SUSE Linux 用户提供了 RPM 包:
# add go repository
zypper ar -f obs://devel:languages:go/ go
# install latest influxdb
zypper in influxdb
FreeBSD/PC-BSD 使用 “pkg” 安装
InfluxDB 是 FreeBSD 包系统的一部分。它可以通过运行来安装:
sudo pkg install influxdb配置文件位于 /usr/local/etc/influxd.conf 中, 可参考 /usr/local/etc/influxd.conf.sample。
通过执行以下命令启动后端:
sudo service influxd onestart要让 InfluxDB 在系统启动时启动,请添加influxd_enable="YES"到/etc/rc.conf.
使用 Linux Binaries 方式安装
1、选择与你linux系统架构匹配的版本:
从浏览器 或 命令行 下载 InfluxDB 二进制文件。
注意:可先网页下载到本地,上传到
/usr/local/src目录下,也可以使用 wget 下载;
从您的浏览器下载
从命令行下载
# amd64
cd /usr/local/src && wget https://dl.influxdata.com/influxdb/releases/influxdb2-2.6.1-linux-amd64.tar.gz

# arm
cd /usr/local/src && wget https://dl.influxdata.com/influxdb/releases/influxdb2-2.6.1-linux-arm64.tar.gz
2、解压并安装
amd64
$ cd /usr/local/src && tar xvzf influxdb2-2.6.1-linux-amd64.tar.gz -C /usr/local
$ cd .. && mv influxdb2_linux_amd64 influxdb
$ echo 'export INFLUXDB_HOME=/usr/local/influxdb/' >>/etc/profile
$ echo 'export PATH="$PATH:$INFLUXDB_HOME/bin"' >>/etc/profile
$ source /etc/profile
# (可选)将提取的influxd可执行二进制文件放入您的系统中$PATH
$ ln -s /usr/local/influxdb/influxd /usr/bin/influxd;
arm
# 本地安装包
$ cd /usr/local/src && tar xvzf influxdb2-2.6.1-linux-arm64.tar.gz -C /usr/local
$ cd .. && mv influxdb2_linux_amd64 influxdb
$ echo 'export INFLUXDB_HOME=/usr/local/influxdb/' >>/etc/profile
$ echo 'export PATH="$PATH:$INFLUXDB_HOME/bin"' >>/etc/profile
$ source /etc/profile
# (可选)将提取的influxd可执行二进制文件放入您的系统中$PATH
$ ln -s /usr/local/influxdb/influxd /usr/bin/influxd;
2、配置 InfluxDB
InfluxDB 配置选项
influxd 通过使用配置标志、设置环境变量或在配置文件中定义配置选项来自定义您的 InfluxDB 配置。
[root@localhost local]# influxd -h

        Start up the daemon configured with flags/env vars/config file.

        The order of precedence for config options are as follows (1 highest, 3 lowest):
                1. flags
                2. env vars
                3. config file

        A config file can be provided via the INFLUXD_CONFIG_PATH env var. If a file is
        not provided via an env var, influxd will look in the current directory for a
        config.{json|toml|yaml|yml} file. If one does not exist, then it will continue unchanged.

Usage:
  influxd [flags]
  influxd [command]

Available Commands:
  downgrade    Downgrade metadata schema used by influxd to match the expectations of an older release
  help         Help about any command
  inspect      Commands for inspecting on-disk database data
  recovery     Commands used to recover / regenerate operator access to the DB
  run          Start the influxd server
  upgrade      Upgrade a 1.x version of InfluxDB
  version      Print the influxd server version

Flags:
      --assets-path string                                              override default assets by serving from a specific directory (developer mode)
      --bolt-path string                                                path to boltdb database (default "/root/.influxdbv2/influxd.bolt")
      --e2e-testing                                                     add /debug/flush endpoint to clear stores; used for end-to-end tests
      --engine-path string                                              path to persistent engine files (default "/root/.influxdbv2/engine")
      --feature-flags stringToString                                    feature flag overrides (default [])
      --flux-log-enabled                                                enables detailed logging for flux queries
      --hardening-enabled                                               enable hardening options (disallow private IPs within flux and templates HTTP requests)
  -h, --help                                                            help for influxd
      --http-bind-address string                                        bind address for the REST HTTP API (default ":8086")
      --http-idle-timeout duration                                      max duration the server should keep established connections alive while waiting for new requests. Set to 0 for no timeout (default 3m0s)
      --http-read-header-timeout duration                               max duration the server should spend trying to read HTTP headers for new requests. Set to 0 for no timeout (default 10s)
      --http-read-timeout duration                                      max duration the server should spend trying to read the entirety of new requests. Set to 0 for no timeout
      --http-write-timeout duration                                     max duration the server should spend on processing+responding to requests. Set to 0 for no timeout
      --influxql-max-select-buckets int                                 The maximum number of group by time bucket a SELECT can create. A value of zero will max the maximum number of buckets unlimited.
      --influxql-max-select-point int                                   The maximum number of points a SELECT can process. A value of 0 will make the maximum point count unlimited. This will only be checked every second so queries will not be aborted immediately when hitting the limit.
      --influxql-max-select-series int                                  The maximum number of series a SELECT can run. A value of 0 will make the maximum series count unlimited.
      --instance-id string                                              add an instance id for replications to prevent collisions and allow querying by edge node
      --log-level Log-Level                                             supported log levels are debug, info, and error (default info)
      --metrics-disabled                                                Don't expose metrics over HTTP at /metrics
      --no-tasks                                                        disables the task scheduler
      --pprof-disabled                                                  Don't expose debugging information over HTTP at /debug/pprof
      --query-concurrency int32                                         the number of queries that are allowed to execute concurrently. Set to 0 to allow an unlimited number of concurrent queries (default 1024)
      --query-initial-memory-bytes int                                  the initial number of bytes allocated for a query when it is started. If this is unset, then query-memory-bytes will be used
      --query-max-memory-bytes int                                      the maximum amount of memory used for queries. Can only be set when query-concurrency is limited. If this is unset, then this number is query-concurrency * query-memory-bytes
      --query-memory-bytes int                                          maximum number of bytes a query is allowed to use at any given time. This must be greater or equal to query-initial-memory-bytes
      --query-queue-size int32                                          the number of queries that are allowed to be awaiting execution before new queries are rejected. Must be > 0 if query-concurrency is not unlimited (default 1024)
      --reporting-disabled                                              disable sending telemetry data to https://telemetry.influxdata.com every 8 hours
      --secret-store string                                             data store for secrets (bolt or vault) (default "bolt")
      --session-length int                                              ttl in minutes for newly created sessions (default 60)
      --session-renew-disabled                                          disables automatically extending session ttl on request
      --sqlite-path string                                              path to sqlite database. if not set, sqlite database will be stored in the bolt-path directory as "influxd.sqlite".
      --storage-cache-max-memory-size Size                              The maximum size a shard's cache can reach before it starts rejecting writes. (default 1.0 GiB)
      --storage-cache-snapshot-memory-size Size                         The size at which the engine will snapshot the cache and write it to a TSM file, freeing up memory. (default 25 MiB)
      --storage-cache-snapshot-write-cold-duration Duration             The length of time at which the engine will snapshot the cache and write it to a new TSM file if the shard hasn't received writes or deletes. (default 10m0s)
      --storage-compact-full-write-cold-duration Duration               The duration at which the engine will compact all TSM files in a shard if it hasn't received a write or delete. (default 4h0m0s)
      --storage-compact-throughput-burst Size                           The rate limit in bytes per second that we will allow TSM compactions to write to disk. (default 48 MiB)
      --storage-max-concurrent-compactions int                          The maximum number of concurrent full and level compactions that can run at one time.  A value of 0 results in 50% of runtime.GOMAXPROCS(0) used at runtime.  Any number greater than 0 limits compactions to that value.  This setting does not apply to cache snapshotting.
      --storage-max-index-log-file-size Size                            The threshold, in bytes, when an index write-ahead log file will compact into an index file. Lower sizes will cause log files to be compacted more quickly and result in lower heap usage at the expense of write throughput. (default 1.0 MiB)
      --storage-no-validate-field-size                                  Skip field-size validation on incoming writes.
      --storage-retention-check-interval Duration                       The interval of time when retention policy enforcement checks run. (default 30m0s)
      --storage-series-file-max-concurrent-snapshot-compactions int     The maximum number of concurrent snapshot compactions that can be running at one time across all series partitions in a database.
      --storage-series-id-set-cache-size int                            The size of the internal cache used in the TSI index to store previously calculated series results.
      --storage-shard-precreator-advance-period Duration                The default period ahead of the endtime of a shard group that its successor group is created. (default 30m0s)
      --storage-shard-precreator-check-interval Duration                The interval of time when the check to pre-create new shards runs. (default 10m0s)
      --storage-tsm-use-madv-willneed                                   Controls whether we hint to the kernel that we intend to page in mmap'd sections of TSM files.
      --storage-validate-keys                                           Validates incoming writes to ensure keys only have valid unicode characters.
      --storage-wal-fsync-delay Duration                                The amount of time that a write will wait before fsyncing. A duration greater than 0 can be used to batch up multiple fsync calls. This is useful for slower disks or when WAL write contention is seen. (default 0s)
      --storage-wal-max-concurrent-writes int                           The max number of writes that will attempt to write to the WAL at a time. (default <nprocs> * 2)
      --storage-wal-max-write-delay storage-wal-max-concurrent-writes   The max amount of time a write will wait when the WAL already has storage-wal-max-concurrent-writes active writes. Set to 0 to disable the timeout. (default 10m0s)
      --storage-write-timeout duration                                  The max amount of time the engine will spend completing a write request before cancelling with a timeout. (default 10s)
      --store string                                                    backing store for REST resources (disk or memory) (default "disk")
      --testing-always-allow-setup                                      ensures the /api/v2/setup endpoint always returns true to allow onboarding
      --tls-cert string                                                 TLS certificate for HTTPs
      --tls-key string                                                  TLS key for HTTPs
      --tls-min-version string                                          Minimum accepted TLS version (default "1.2")
      --tls-strict-ciphers                                              Restrict accept ciphers to: ECDHE_ECDSA_WITH_AES_128_GCM_SHA256, ECDHE_RSA_WITH_AES_128_GCM_SHA256, ECDHE_ECDSA_WITH_AES_256_GCM_SHA384, ECDHE_RSA_WITH_AES_256_GCM_SHA384, ECDHE_ECDSA_WITH_CHACHA20_POLY1305, ECDHE_RSA_WITH_CHACHA20_POLY1305
      --tracing-type string                                             supported tracing types are log, jaeger
      --ui-disabled                                                     Disable the InfluxDB UI
      --vault-addr string                                               address of the Vault server expressed as a URL and port, for example: https://127.0.0.1:8200/.
      --vault-cacert string                                             path to a PEM-encoded CA certificate file on the local disk. This file is used to verify the Vault server's SSL certificate. This environment variable takes precedence over VAULT_CAPATH.
      --vault-capath string                                             path to a directory of PEM-encoded CA certificate files on the local disk. These certificates are used to verify the Vault server's SSL certificate.
      --vault-client-cert string                                        path to a PEM-encoded client certificate on the local disk. This file is used for TLS communication with the Vault server.
      --vault-client-key string                                         path to an unencrypted, PEM-encoded private key on disk which corresponds to the matching client certificate.
      --vault-client-timeout duration                                   timeout variable. The default value is 60s.
      --vault-max-retries int                                           maximum number of retries when a 5xx error code is encountered. The default is 2, for three total attempts. Set this to 0 or less to disable retrying.
      --vault-skip-verify                                               do not verify Vault's presented certificate before communicating with it. Setting this variable is not recommended and voids Vault's security model.
      --vault-tls-server-name string                                    name to use as the SNI host when connecting via TLS.
      --vault-token string                                              vault authentication token

Use "influxd [command] --help" for more information about a command.
查看您的运行时服务器配置
使用influxCLI 或 InfluxDB API 获取 InfluxDB 实例的运行时服务器配置。
服务器配置命令需要操作员令牌。
使用 CLI 查看服务器配置
使用influx server-config命令 检索您的运行时服务器配置。
influx server-config使用 API 查看您的服务器配置
使用/api/v2/configInfluxDB API 端点检索您的运行时服务器配置。
获取 http://localhost:8086/api/v2/config配置优先级
InfluxDB 使用以下优先级遵循配置设置:
- influxd flag
- 环境变量
- 配置文件设置
InfluxDB 配置文件
启动时 influxd,它会检查在当前工作目录中以 config.* 命名的文件。文件扩展名取决于配置文件的语法。InfluxDB 配置文件支持以下语法:
- YAML (.yaml, .yml)
- TOML (.toml)
- JSON (.json)
要自定义配置文件的目录路径,请将INFLUXD_CONFIG_PATH 环境变量设置为您的自定义路径。
$ echo 'export INFLUXD_CONFIG_PATH=/usr/local/influxdb' >>/etc/profile
$ source /etc/profile
示例配置文件
YAML
vi /usr/local/influxdb/config.yamlquery-concurrency: 20
query-queue-size: 15
secret-store: vault
session-length: 120
tls-cert: /path/to/influxdb.crt
tls-key: /path/to/influxdb.keyTOML
query-concurrency = 20
query-queue-size = 15
secret-store = "vault"
session-length = 120
tls-cert = "/path/to/influxdb.crt"
tls-key = "/path/to/influxdb.key"
JSON
{
  "query-concurrency": 20,
  "query-queue-size": 15,
  "secret-store": "vault",
  "session-length": 120,
  "tls-cert": "/path/to/influxdb.crt",
  "tls-key": "/path/to/influxdb.key"
}
3、启动 InfluxDB
如果 InfluxDB 作为 systemd 服务安装,则 systemd 管理influxd守护进程,不需要进一步的操作。如果二进制文件是手动下载并添加到系统中的,请使用以下命令$PATH启动守护进程:influxd
[root@localhost local]# influxd
2023-02-08T08:40:26.285251Z     info    Welcome to InfluxDB     {"log_id": "0ft2mDg0000", "version": "v2.6.1", "commit": "9dcf880fe0", "build_date": "2022-12-29T15:53:07Z", "log_level": "info"}
2023-02-08T08:40:26.326574Z     info    Resources opened        {"log_id": "0ft2mDg0000", "service": "bolt", "path": "/root/.influxdbv2/influxd.bolt"}
2023-02-08T08:40:26.326708Z     info    Resources opened        {"log_id": "0ft2mDg0000", "service": "sqlite", "path": "/root/.influxdbv2/influxd.sqlite"}
2023-02-08T08:40:26.338018Z     info    Bringing up metadata migrations {"log_id": "0ft2mDg0000", "service": "KV migrations", "migration_count": 20}
2023-02-08T08:40:27.847882Z     info    Bringing up metadata migrations {"log_id": "0ft2mDg0000", "service": "SQL migrations", "migration_count": 8}
2023-02-08T08:40:28.143999Z     info    Using data dir  {"log_id": "0ft2mDg0000", "service": "storage-engine", "service": "store", "path": "/root/.influxdbv2/engine/data"}
2023-02-08T08:40:28.144207Z     info    Compaction settings     {"log_id": "0ft2mDg0000", "service": "storage-engine", "service": "store", "max_concurrent_compactions": 4, "throughput_bytes_per_second": 50331648, "throughput_bytes_per_second_burst": 50331648}
2023-02-08T08:40:28.144291Z     info    Open store (start)      {"log_id": "0ft2mDg0000", "service": "storage-engine", "service": "store", "op_name": "tsdb_open", "op_event": "start"}
2023-02-08T08:40:28.144402Z     info    Open store (end)        {"log_id": "0ft2mDg0000", "service": "storage-engine", "service": "store", "op_name": "tsdb_open", "op_event": "end", "op_elapsed": "0.127ms"}
2023-02-08T08:40:28.144468Z     info    Starting retention policy enforcement service   {"log_id": "0ft2mDg0000", "service": "retention", "check_interval": "30m"}
2023-02-08T08:40:28.144499Z     info    Starting precreation service    {"log_id": "0ft2mDg0000", "service": "shard-precreation", "check_interval": "10m", "advance_period": "30m"}
2023-02-08T08:40:28.146053Z     info    Starting query controller       {"log_id": "0ft2mDg0000", "service": "storage-reads", "concurrency_quota": 1024, "initial_memory_bytes_quota_per_query": 9223372036854775807, "memory_bytes_quota_per_query": 9223372036854775807, "max_memory_bytes": 0, "queue_size": 1024}
2023-02-08T08:40:28.150441Z     info    Configuring InfluxQL statement executor (zeros indicate unlimited).     {"log_id": "0ft2mDg0000", "max_select_point": 0, "max_select_series": 0, "max_select_buckets": 0}
2023-02-08T08:40:28.191576Z     info    Starting        {"log_id": "0ft2mDg0000", "service": "telemetry", "interval": "8h"}
2023-02-08T08:40:28.194039Z     info    Listening       {"log_id": "0ft2mDg0000", "service": "tcp-listener", "transport": "http", "addr": ":8086", "port": 8086}
4、开机自启动
创建专用的数据存储目录
mkdir -p /data/influxdb/data;
mkdir -p /data/influxdb/meta;
mkdir -p /data/influxdb/wal;
mkdir -p /data/influxdb/logs;
mkdir -p /usr/lib/influxdb/scripts;
创建 influxdb:influxdb 用户组和用户(安装程序自动安装的,默认创建了 influxdb 用户组和 influxdb 用户),并进行授权:
groupadd influxdb;
useradd -g influxdb -M -s /sbin/nologin influxdb;
chown -R influxdb. /data/influxdb;
创建开机启动脚本(来自官方程序安装后的文件):
influxdb.service
vi /lib/systemd/system/influxdb.service脚本内容:
[Unit]
Description=InfluxDB is an open-source, distributed, time series database
Documentation=https://docs.influxdata.com/influxdb/
After=network.target remote-fs.target nss-lookup.target

[Service]
PIDFile=/var/lib/influxdb/influxd.pid
ExecStart=/usr/local/influxdb/influxd
ExecReload=/bin/kill -s HUP $MAINPID
ExecStop=/bin/kill -s QUIT $MAINPID
LimitNOFILE=65536
Restart=0

[Install]
WantedBy=multi-user.target
Alias=influxd.service
设置随机启动:
[root@local ~]# systemctl daemon-reload
[root@local ~]# systemctl disable influxdb.service
[root@local ~]# systemctl enable influxdb.service
[root@local ~]# systemctl start influxdb.service
[root@local ~]# systemctl status influxdb.service
[root@local ~]# systemctl stop influxdb.service
[root@local ~]# systemctl restart influxdb.service端口: InfluxDB 通过端口 8088、8089 和 8091 进行通信。
一定要确保端口放开,或者直接关闭防火墙,否则后续一定会出现错误。
# CentOS
firewall-cmd --zone=public --add-port=8086/tcp --permanent;
firewall-cmd --zone=public --add-port=8088/tcp --permanent;
firewall-cmd --zone=public --add-port=8089/tcp --permanent;
firewall-cmd --zone=public --add-port=8091/tcp --permanent;

iptables -I INPUT -m tcp -p tcp --dport 8086 -j ACCEPT;
iptables -I INPUT -m tcp -p tcp --dport 8088 -j ACCEPT;
iptables -I INPUT -m tcp -p tcp --dport 8089 -j ACCEPT;
iptables -I INPUT -m tcp -p tcp --dport 8091 -j ACCEPT;
浏览器访问数据库管理平台:
http://[IP]:8086/

安装 influx CLI(可选)
使用influxCLI 与 InfluxDB 实例交互并对其进行管理。编写和查询数据、生成 InfluxDB 模板、导出数据等。
1、下载 influx CLI 包。
从 浏览器 或命令行下载influxCLI 包。
注意:可先网页下载到本地,上传到
/usr/local/src目录下,也可以使用 wget 下载;
从您的浏览器下载
从命令行下载
# amd64
cd /usr/local/src && wget https://dl.influxdata.com/influxdb/releases/influxdb2-client-2.6.1-linux-amd64.tar.gz

# arm
cd /usr/local/src && wget https://dl.influxdata.com/influxdb/releases/influxdb2-client-2.6.1-linux-arm64.tar.gz
2、解压并安装
amd64
$ cd /usr/local/src && tar xvzf influxdb2-client-2.6.1-linux-amd64.tar.gz -C /usr/local
$ cd .. && mv influxdb2-client-2.6.1-linux-amd64 influxdb2-client
$ echo 'export INFLUXDB_HOME=/usr/local/influxdb2-client/' >>/etc/profile
$ echo 'export PATH="$PATH:$INFLUXDB_HOME/bin"' >>/etc/profile
$ source /etc/profile
# (可选)将提取的influxd可执行二进制文件放入您的系统中$PATH
$ sudo cp influxdb2-client/influx /usr/local/bin/
arm
$ cd /usr/local/src && tar xvzf influxdb2-client-2.6.1-linux-arm64.tar.gz -C /usr/local
$ cd .. && mv influxdb2-client-2.6.1-linux-arm64 influxdb2-client
$ echo 'export INFLUXDB_HOME=/usr/local/influxdb2-client/' >>/etc/profile
$ echo 'export PATH="$PATH:$INFLUXDB_HOME/bin"' >>/etc/profile
$ source /etc/profile
# (可选)将提取的influxd可执行二进制文件放入您的系统中$PATH
$ sudo cp influxdb2-client/influx /usr/local/bin/
配置完成后命令行执行 influx 查看命令情况
[root@localhost local]# influx
NAME:
   influx - Influx Client

USAGE:
   influx [command]

HINT: If you are looking for the InfluxQL shell from 1.x, run "influx v1 shell"

COMMANDS:
   version              Print the influx CLI version
   write                Write points to InfluxDB
   bucket               Bucket management commands
   completion           Generates completion scripts
   query                Execute a Flux query
   config               Config management commands
   org, organization    Organization management commands
   delete               Delete points from InfluxDB
   user                 User management commands
   task                 Task management commands
   telegrafs            List Telegraf configuration(s). Subcommands manage Teleg                                                                                             raf configurations.
   dashboards           List Dashboard(s).
   export               Export existing resources as a template
   secret               Secret management commands
   v1                   InfluxDB v1 management commands
   auth, authorization  Authorization management commands
   apply                Apply a template to manage resources
   stacks               List stack(s) and associated templates. Subcommands mana                                                                                             ge stacks.
   template             Summarize the provided template
   bucket-schema        Bucket schema management commands
   scripts              Scripts management commands
   ping                 Check the InfluxDB /health endpoint
   setup                Setup instance with initial user, org, bucket
   backup               Backup database
   restore              Restores a backup directory to InfluxDB
   remote               Remote connection management commands
   replication          Replication stream management commands
   server-config        Display server config
   help, h              Shows a list of commands or help for one command

GLOBAL OPTIONS:
   --help, -h  show help
通过 UI 设置 InfluxDB
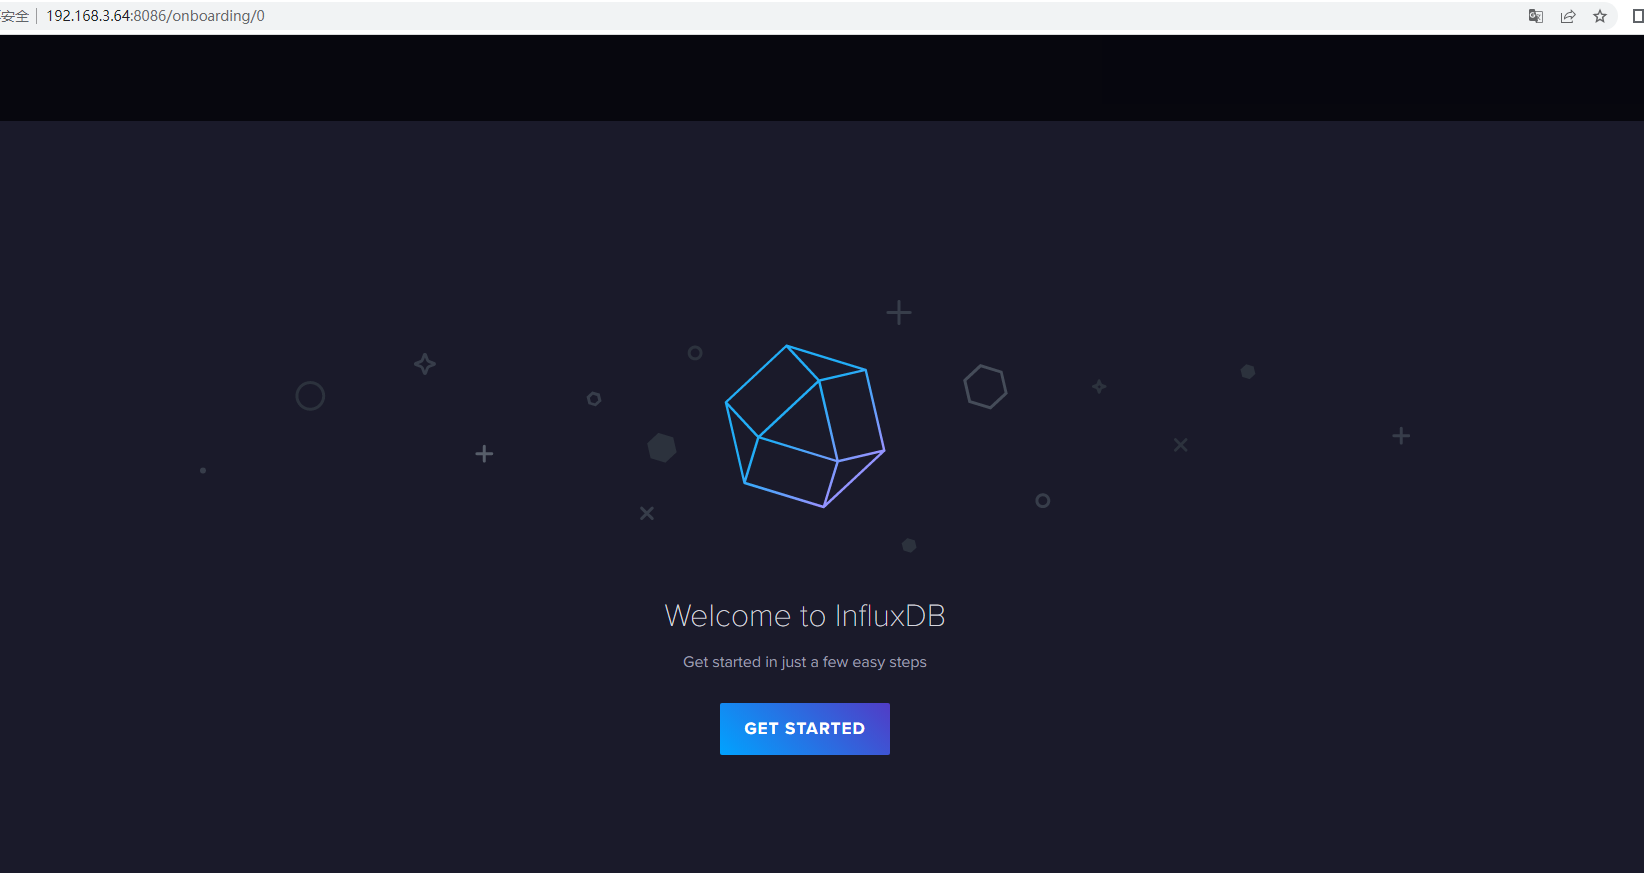
在 InfluxDB 运行的情况下,访问 http://localhost:8086
- 点击开始

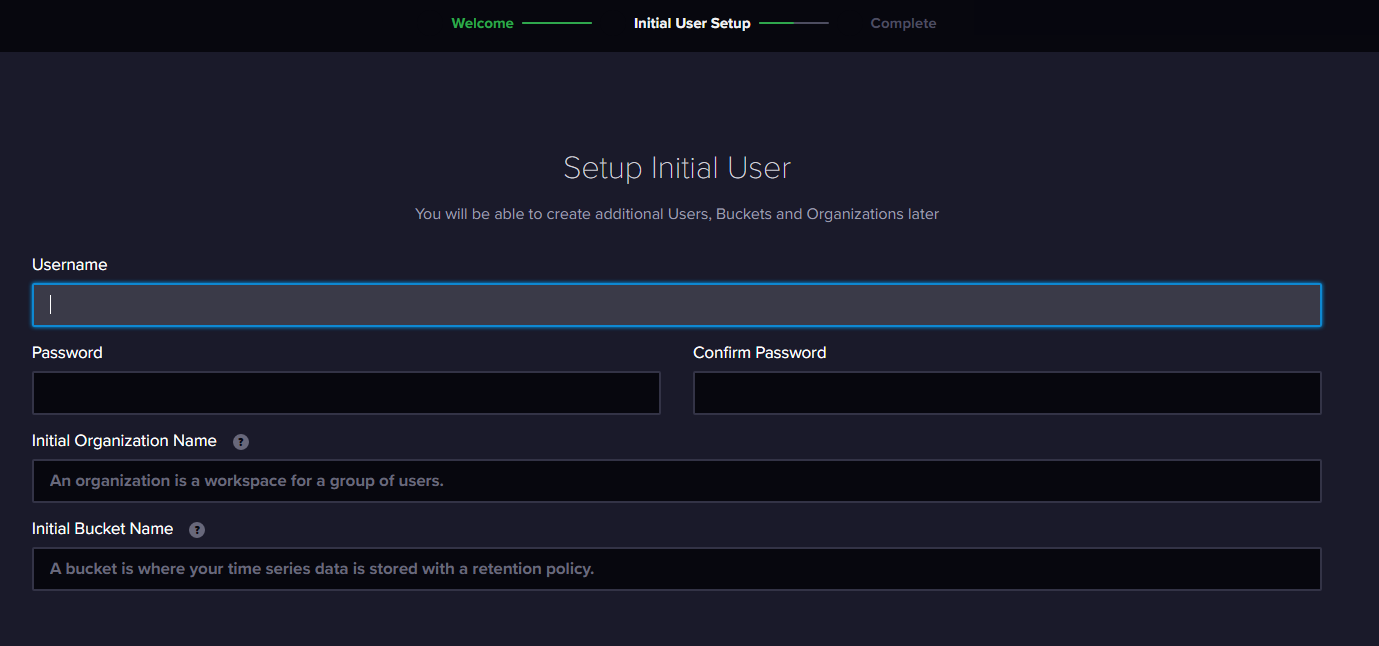
- 设置您的初始用户

- 输入初始用户的用户名。
- 为您的用户输入密码和确认密码。
- 输入您的初始组织名称。
- 输入您的初始Bucket Name。
- 单击继续。

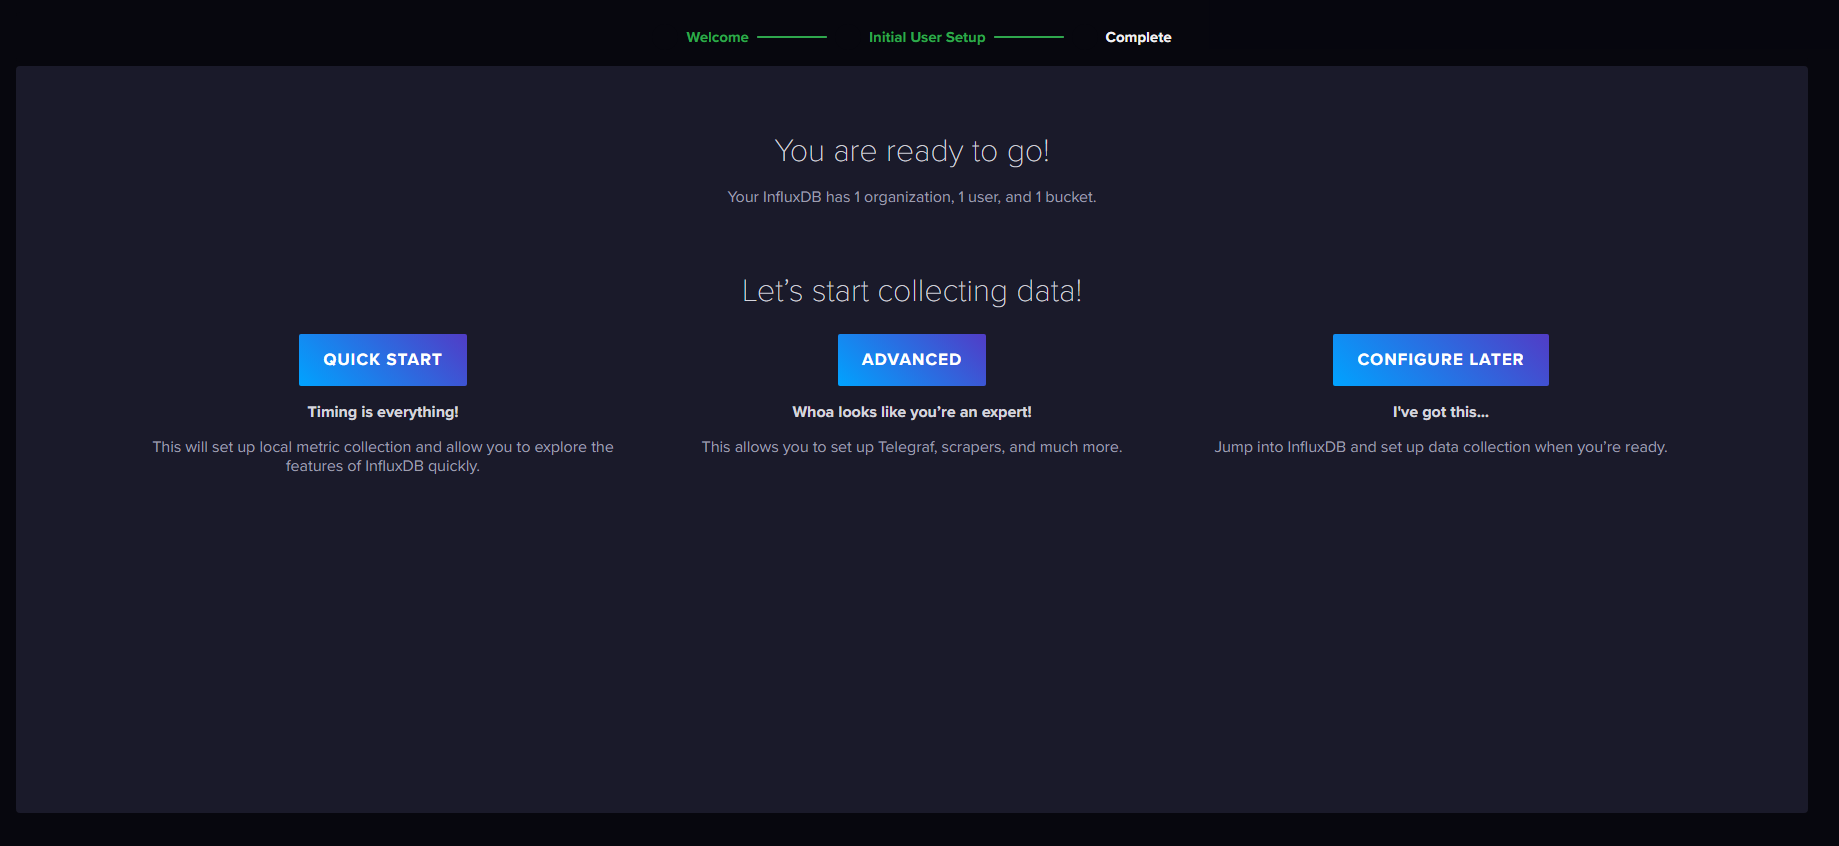
- 您的 InfluxDB 实例现已初始化。
Username : "influxdb"
Password : "SsFhNK6BQqhVCjg"
Initial Organization Name : test
Initial Bucket Name:telegraf
cSwrqv6ztcCEmTB7ETbvnGeG-hrRv58UAiuRY7tTQmhS_Y5l4ETWPxb-NZD5oden4rLDBt7u11dyvkgyJhuLvA==
最后编辑:Jeebiz 更新时间:2024-02-26 11:21
