宝塔 Nginx 配置 FastDFS
前着重讲述了FastDFS的安装和配置,在实际使用中,我们常会使用到Linux的管理工具,比如比较好用的“宝塔面板”,下面的内容,主要讲述如何在宝塔面板内配置FastDFS的服务;
一、修改宝塔 Nginx 和 fastdfs-nginx-module 源码
修改 /www/fastdfs/fastdfs-6.06/fastdfs-nginx-module-1.22/src/ 下的 config 文件,修改如下:
ngx_module_incs="/usr/include/fastdfs /usr/include/fastcommon/"
CORE_INCS="$CORE_INCS /usr/include/fastdfs /usr/include/fastcommon/"
引入依赖
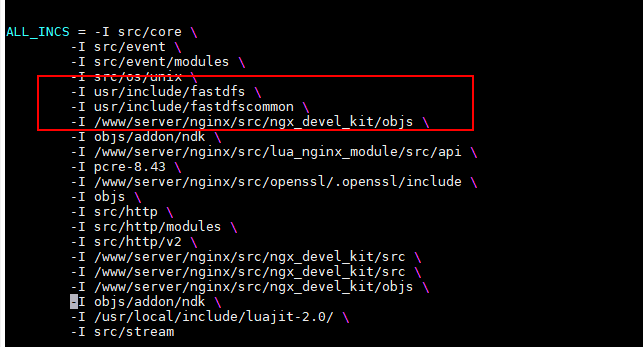
编辑 /www/server/nginx/src/objs/Makefile
vim /www/server/nginx/src/objs/Makefile

# 添加以下语句
-I usr/include/fastdfs \
-I usr/include/fastdfscommon \
二、重新编译 Nginx 配置
宝塔面板安装完成后,可选择编译安装Nginx,待编译安装完成后,可以使用源码重新安装;
# 进入源码目录
cd /www/server/nginx/src/
# 查看nginx的编译参数
nginx -V
# 复制返回的结果, 并添加FastDFS模块,重新执行./configure
./configure --user=www --group=www --prefix=/www/server/nginx --add-module=/www/server/nginx/src/ngx_devel_kit --add-module=/www/server/nginx/src/lua_nginx_module --add-module=/www/server/nginx/src/ngx_cache_purge --add-module=/www/server/nginx/src/nginx-sticky-module --with-openssl=/www/server/nginx/src/openssl --with-pcre=pcre-8.43 --with-http_v2_module --with-stream --with-stream_ssl_module --with-stream_ssl_preread_module --with-http_stub_status_module --with-http_ssl_module --with-http_image_filter_module --with-http_gzip_static_module --with-http_gunzip_module --with-ipv6 --with-http_sub_module --with-http_flv_module --with-http_addition_module --with-http_realip_module --with-http_mp4_module --with-ld-opt=-Wl,-E --with-cc-opt=-Wno-error --with-ld-opt=-ljemalloc --with-http_dav_module --add-module=/www/server/nginx/src/nginx-dav-ext-module --add-module=/www/fastdfs/fastdfs-6.06/fastdfs-nginx-module-1.22/src
编译 Nginx
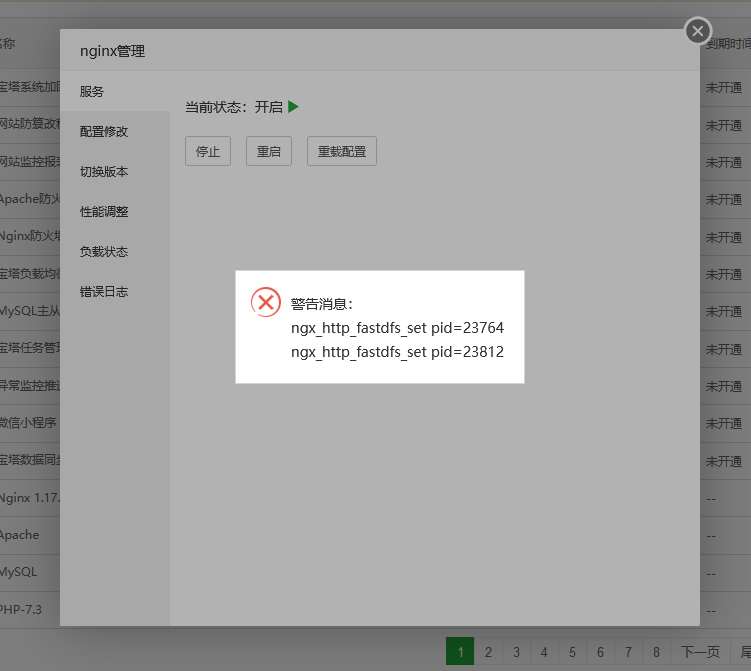
make && make install
一、通过宝塔面板界面配置FastDFS
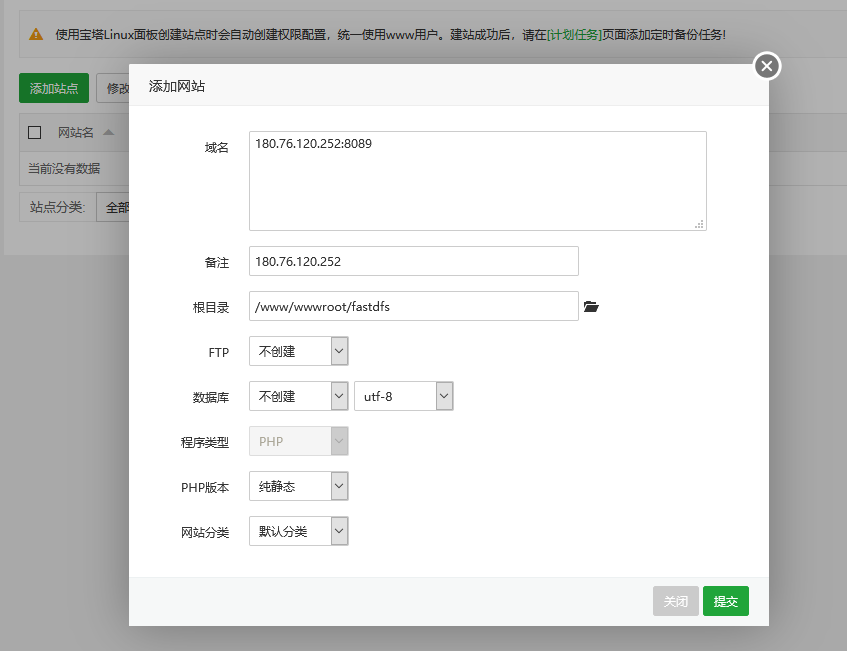
1.1、创建网站
使用宝塔面板创建一个新的网站

域名写 127.0.0.1:9999 即可,记得阿里云防火墙开发端口
1.2、配置 FastDFS 负载
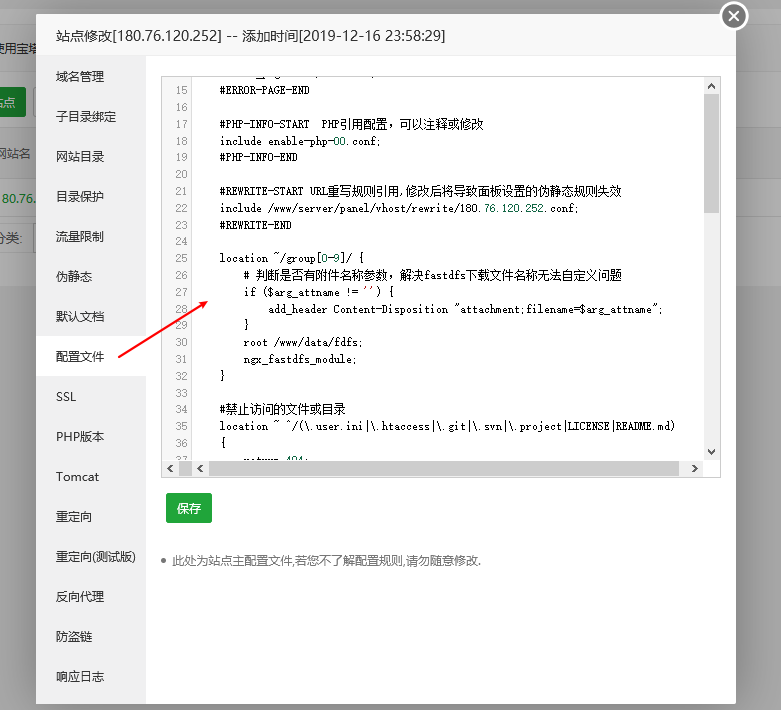
通过宝塔的站点管理,点击设置;配置FastDFS的负载

在默认配置项,增加如下内容:
location ~/group[0-9]/ {
    # 判断是否有附件名称参数,解决fastdfs下载文件名称无法自定义问题
    if ($arg_attname != '') {
        add_header Content-Disposition "attachment;filename=$arg_attname";
    }
    root /www/fastdfs/data;
    ngx_fastdfs_module;
}
界面如下:

点击保存即可。
server
{
    listen 8089;
    server_name 180.76.120.252;
    index index.php index.html index.htm default.php default.htm default.html;
    root /www/wwwroot/fastdfs;

    #SSL-START SSL相关配置,请勿删除或修改下一行带注释的404规则
    #error_page 404/404.html;

    #SSL-END

    #ERROR-PAGE-START  错误页配置,可以注释、删除或修改
    #error_page 404 /404.html;
    #error_page 502 /502.html;
    #ERROR-PAGE-END

    #PHP-INFO-START  PHP引用配置,可以注释或修改
    include enable-php-00.conf;
    #PHP-INFO-END

    #REWRITE-START URL重写规则引用,修改后将导致面板设置的伪静态规则失效
    include /www/server/panel/vhost/rewrite/180.76.120.252.conf;
    #REWRITE-END

    location ~/group[0-9]/ {
        # 判断是否有附件名称参数,解决fastdfs下载文件名称无法自定义问题
        if ($arg_attname != '') {
            add_header Content-Disposition "attachment;filename=$arg_attname";
        }
        root /www/data/fdfs;
        ngx_fastdfs_module;
    }

    #禁止访问的文件或目录
    location ~ ^/(\.user.ini|\.htaccess|\.git|\.svn|\.project|LICENSE|README.md)
    {
        return 404;
    }

    #一键申请SSL证书验证目录相关设置
    location ~ \.well-known{
        allow all;
    }

    location ~ .*\.(gif|jpg|jpeg|png|bmp|swf)$
    {
        expires      30d;
        error_log off;
        access_log /dev/null;
    }

    location ~ .*\.(js|css)?$
    {
        expires      12h;
        error_log off;
        access_log /dev/null;
    }
    access_log  /www/wwwlogs/180.76.120.252.log;
    error_log  /www/wwwlogs/180.76.120.252.error.log;
}
1.3、测试访问图片资源
上传图片到fastdfs:
[root@fastdfs fastdfs-6.04]# fdfs_upload_file /etc/fdfs/client.conf test.png
group1/M00/00/00/tEx4_F33cumAP1rZAAHhhuzN4Ts949.jpg浏览器访问:http://180.76.120.252:8089/group1/M00/00/00/tEx4_F33cumAP1rZAAHhhuzN4Ts949.jpg

参考资料
https://blog.csdn.net/m_snowman/article/details/101295526
https://blog.csdn.net/m_snowman/article/details/101295754
https://blog.csdn.net/m_snowman/article/details/101295928
作者:Jeebiz 创建时间:2022-12-09 09:39
最后编辑:Jeebiz 更新时间:2025-07-08 18:33
最后编辑:Jeebiz 更新时间:2025-07-08 18:33
