https://blog.csdn.net/zkc7441976/article/details/115868050
https://blog.csdn.net/w1206507055/article/details/125301208
安装 Logstash
Ubuntu & Debian 使用 “apt-get” 安装
添加Logstash官方apt源:
#下载并安装公共签名密钥:
wget -qO - https://artifacts.elastic.co/GPG-KEY-elasticsearch | sudo gpg --dearmor -o /usr/share/keyrings/elastic-keyring.gpg;
sudo apt-get install apt-transport-https;
echo "deb [signed-by=/usr/share/keyrings/elastic-keyring.gpg] https://artifacts.elastic.co/packages/8.x/apt stable main" | sudo tee -a /etc/apt/sources.list.d/elastic-8.x.list;
警告:使用echo上述方法添加 Logstash 存储库。不要使用add-apt-repository,因为它也会添加一个deb-src条目,但我们不提供源码包。如果您已添加该deb-src条目,您将看到如下错误:
无法在发布文件中找到预期条目“main/source/Sources”(错误的 sources.list 条目或格式错误的文件)
只需deb-src从/etc/apt/sources.list文件中删除条目,安装就会按预期进行。
然后,安装并启动 Logstash 服务:
sudo apt-get update && sudo apt-get install logstash
sudo service logstash start
或者,如果您的操作系统使用的是 systemd(Ubuntu 15.04+、Debian 8+):
sudo apt-get update && sudo apt-get install logstash
sudo systemctl unmask logstash.service
sudo systemctl start logstash
Red Hat && CentOS 使用 “yum” 安装
sudo rpm --import https://artifacts.elastic.co/GPG-KEY-elasticsearchRed Hat 和 CentOS 用户可以使用yum包管理器安装最新稳定版本的 Logstash
cat <<EOF | sudo tee /etc/yum.repos.d/elastic-8.x.repo
[logstash-8.x]
name=Elastic repository for 8.x packages
baseurl=https://artifacts.elastic.co/packages/8.x/yum
gpgcheck=1
gpgkey=https://artifacts.elastic.co/GPG-KEY-elasticsearch
enabled=1
autorefresh=1
type=rpm-md
EOF将存储库添加到yum配置后,通过运行以下命令安装并启动 Logstash 服务:
sudo yum install logstash
sudo service logstash start
或者,如果您的操作系统使用的是 systemd(CentOS 7+、RHEL 7+):
sudo yum install logstash
sudo systemctl start logstash
SLES & openSUSE 使用 “zypper” 安装
openSUSE Build Service 为 SUSE Linux 用户提供了 RPM 包:
# add go repository
zypper ar -f obs://devel:languages:go/ go
# install latest influxdb
zypper in influxdb
FreeBSD/PC-BSD 使用 “pkg” 安装
InfluxDB 是 FreeBSD 包系统的一部分。它可以通过运行来安装:
sudo pkg install influxdb配置文件位于 /usr/local/etc/influxd.conf 中, 可参考 /usr/local/etc/influxd.conf.sample。
通过执行以下命令启动后端:
sudo service influxd onestart要让 InfluxDB 在系统启动时启动,请添加influxd_enable="YES"到/etc/rc.conf.
使用 Linux Binaries 方式安装
1、选择与你linux系统架构匹配的版本:
从浏览器 或 命令行 下载 InfluxDB 二进制文件。
下载页面:https://www.elastic.co/cn/downloads/logstash
注意:可先网页下载到本地,上传到
/usr/local/src目录下,也可以使用 wget 下载;
从您的浏览器下载
从命令行下载
# amd64
cd /usr/local/src && wget https://dl.influxdata.com/influxdb/releases/influxdb2-2.6.1-linux-amd64.tar.gz

# arm
cd /usr/local/src && wget https://dl.influxdata.com/influxdb/releases/influxdb2-2.6.1-linux-arm64.tar.gz
2、解压并安装
amd64
$ cd /usr/local/src && tar xvzf influxdb2-2.6.1-linux-amd64.tar.gz -C /usr/local
$ cd .. && mv influxdb2_linux_amd64 influxdb
$ echo 'export INFLUXDB_HOME=/usr/local/influxdb/' >>/etc/profile
$ echo 'export PATH="$PATH:$INFLUXDB_HOME/bin"' >>/etc/profile
$ source /etc/profile
# (可选)将提取的influxd可执行二进制文件放入您的系统中$PATH
$ ln -s /usr/local/influxdb/influxd /usr/bin/influxd;
arm
# 本地安装包
$ cd /usr/local/src && tar xvzf influxdb2-2.6.1-linux-arm64.tar.gz -C /usr/local
$ cd .. && mv influxdb2_linux_amd64 influxdb
$ echo 'export INFLUXDB_HOME=/usr/local/influxdb/' >>/etc/profile
$ echo 'export PATH="$PATH:$INFLUXDB_HOME/bin"' >>/etc/profile
$ source /etc/profile
# (可选)将提取的influxd可执行二进制文件放入您的系统中$PATH
$ ln -s /usr/local/influxdb/influxd /usr/bin/influxd;
2、配置 InfluxDB
InfluxDB 配置选项
influxd 通过使用配置标志、设置环境变量或在配置文件中定义配置选项来自定义您的 InfluxDB 配置。
查看您的运行时服务器配置
使用influxCLI 或 InfluxDB API 获取 InfluxDB 实例的运行时服务器配置。
服务器配置命令需要操作员令牌。
使用 CLI 查看服务器配置
使用influx server-config命令 检索您的运行时服务器配置。
influx server-config使用 API 查看您的服务器配置
使用/api/v2/configInfluxDB API 端点检索您的运行时服务器配置。
获取 http://localhost:8086/api/v2/config配置优先级
InfluxDB 使用以下优先级遵循配置设置:
- influxd flag
- 环境变量
- 配置文件设置
InfluxDB 配置文件
启动时 influxd,它会检查在当前工作目录中以 config.* 命名的文件。文件扩展名取决于配置文件的语法。InfluxDB 配置文件支持以下语法:
- YAML (.yaml, .yml)
- TOML (.toml)
- JSON (.json)
要自定义配置文件的目录路径,请将INFLUXD_CONFIG_PATH 环境变量设置为您的自定义路径。
$ echo 'export INFLUXD_CONFIG_PATH=/usr/local/influxdb' >>/etc/profile
$ source /etc/profile
示例配置文件
YAML
vi /usr/local/influxdb/config.yamlquery-concurrency: 20
query-queue-size: 15
secret-store: vault
session-length: 120
tls-cert: /path/to/influxdb.crt
tls-key: /path/to/influxdb.keyTOML
query-concurrency = 20
query-queue-size = 15
secret-store = "vault"
session-length = 120
tls-cert = "/path/to/influxdb.crt"
tls-key = "/path/to/influxdb.key"
JSON
{
  "query-concurrency": 20,
  "query-queue-size": 15,
  "secret-store": "vault",
  "session-length": 120,
  "tls-cert": "/path/to/influxdb.crt",
  "tls-key": "/path/to/influxdb.key"
}
3、启动 InfluxDB
如果 InfluxDB 作为 systemd 服务安装,则 systemd 管理influxd守护进程,不需要进一步的操作。如果二进制文件是手动下载并添加到系统中的,请使用以下命令$PATH启动守护进程:influxd
[root@localhost local]# influxd
2023-02-08T08:40:26.285251Z     info    Welcome to InfluxDB     {"log_id": "0ft2mDg0000", "version": "v2.6.1", "commit": "9dcf880fe0", "build_date": "2022-12-29T15:53:07Z", "log_level": "info"}
2023-02-08T08:40:26.326574Z     info    Resources opened        {"log_id": "0ft2mDg0000", "service": "bolt", "path": "/root/.influxdbv2/influxd.bolt"}
2023-02-08T08:40:26.326708Z     info    Resources opened        {"log_id": "0ft2mDg0000", "service": "sqlite", "path": "/root/.influxdbv2/influxd.sqlite"}
2023-02-08T08:40:26.338018Z     info    Bringing up metadata migrations {"log_id": "0ft2mDg0000", "service": "KV migrations", "migration_count": 20}
2023-02-08T08:40:27.847882Z     info    Bringing up metadata migrations {"log_id": "0ft2mDg0000", "service": "SQL migrations", "migration_count": 8}
2023-02-08T08:40:28.143999Z     info    Using data dir  {"log_id": "0ft2mDg0000", "service": "storage-engine", "service": "store", "path": "/root/.influxdbv2/engine/data"}
2023-02-08T08:40:28.144207Z     info    Compaction settings     {"log_id": "0ft2mDg0000", "service": "storage-engine", "service": "store", "max_concurrent_compactions": 4, "throughput_bytes_per_second": 50331648, "throughput_bytes_per_second_burst": 50331648}
2023-02-08T08:40:28.144291Z     info    Open store (start)      {"log_id": "0ft2mDg0000", "service": "storage-engine", "service": "store", "op_name": "tsdb_open", "op_event": "start"}
2023-02-08T08:40:28.144402Z     info    Open store (end)        {"log_id": "0ft2mDg0000", "service": "storage-engine", "service": "store", "op_name": "tsdb_open", "op_event": "end", "op_elapsed": "0.127ms"}
2023-02-08T08:40:28.144468Z     info    Starting retention policy enforcement service   {"log_id": "0ft2mDg0000", "service": "retention", "check_interval": "30m"}
2023-02-08T08:40:28.144499Z     info    Starting precreation service    {"log_id": "0ft2mDg0000", "service": "shard-precreation", "check_interval": "10m", "advance_period": "30m"}
2023-02-08T08:40:28.146053Z     info    Starting query controller       {"log_id": "0ft2mDg0000", "service": "storage-reads", "concurrency_quota": 1024, "initial_memory_bytes_quota_per_query": 9223372036854775807, "memory_bytes_quota_per_query": 9223372036854775807, "max_memory_bytes": 0, "queue_size": 1024}
2023-02-08T08:40:28.150441Z     info    Configuring InfluxQL statement executor (zeros indicate unlimited).     {"log_id": "0ft2mDg0000", "max_select_point": 0, "max_select_series": 0, "max_select_buckets": 0}
2023-02-08T08:40:28.191576Z     info    Starting        {"log_id": "0ft2mDg0000", "service": "telemetry", "interval": "8h"}
2023-02-08T08:40:28.194039Z     info    Listening       {"log_id": "0ft2mDg0000", "service": "tcp-listener", "transport": "http", "addr": ":8086", "port": 8086}
4、开机自启动
创建专用的数据存储目录
mkdir -p /data/influxdb/data;
mkdir -p /data/influxdb/meta;
mkdir -p /data/influxdb/wal;
mkdir -p /data/influxdb/logs;
mkdir -p /usr/lib/influxdb/scripts;
创建 influxdb:influxdb 用户组和用户(安装程序自动安装的,默认创建了 influxdb 用户组和 influxdb 用户),并进行授权:
groupadd influxdb;
useradd -g influxdb -M -s /sbin/nologin influxdb;
chown -R influxdb. /data/influxdb;
创建开机启动脚本(来自官方程序安装后的文件):
influxdb.service
vi /lib/systemd/system/influxdb.service脚本内容:
[Unit]
Description=InfluxDB is an open-source, distributed, time series database
Documentation=https://docs.influxdata.com/influxdb/
After=network.target remote-fs.target nss-lookup.target

[Service]
PIDFile=/var/lib/influxdb/influxd.pid
ExecStart=/usr/local/influxdb/influxd > /data/influxdb/logs/influxdb.log 2>&1 &
ExecReload=/bin/kill -s HUP $MAINPID
ExecStop=/bin/kill -s QUIT $MAINPID
LimitNOFILE=65536
Restart=0

[Install]
WantedBy=multi-user.target
Alias=influxd.service
设置随机启动:
[root@local ~]# systemctl daemon-reload
[root@local ~]# systemctl disable influxdb.service
[root@local ~]# systemctl enable influxdb.service
[root@local ~]# systemctl start influxdb.service
[root@local ~]# systemctl status influxdb.service
[root@local ~]# systemctl stop influxdb.service
[root@local ~]# systemctl restart influxdb.service端口: InfluxDB 通过端口 8088、8089 和 8091 进行通信。
一定要确保端口放开,或者直接关闭防火墙,否则后续一定会出现错误。
# CentOS
firewall-cmd --zone=public --add-port=8086/tcp --permanent;
firewall-cmd --zone=public --add-port=8088/tcp --permanent;
firewall-cmd --zone=public --add-port=8089/tcp --permanent;
firewall-cmd --zone=public --add-port=8091/tcp --permanent;

iptables -I INPUT -m tcp -p tcp --dport 8086 -j ACCEPT;
iptables -I INPUT -m tcp -p tcp --dport 8088 -j ACCEPT;
iptables -I INPUT -m tcp -p tcp --dport 8089 -j ACCEPT;
iptables -I INPUT -m tcp -p tcp --dport 8091 -j ACCEPT;
浏览器访问数据库管理平台:
http://[IP]:8086/

安装 influx CLI(可选)
使用influxCLI 与 InfluxDB 实例交互并对其进行管理。编写和查询数据、生成 InfluxDB 模板、导出数据等。
1、下载 influx CLI 包。
从 浏览器 或命令行下载influxCLI 包。
注意:可先网页下载到本地,上传到
/usr/local/src目录下,也可以使用 wget 下载;
从您的浏览器下载
从命令行下载
# amd64
wget https://dl.influxdata.com/influxdb/releases/influxdb2-client-2.6.1-linux-amd64.tar.gz

# arm
wget https://dl.influxdata.com/influxdb/releases/influxdb2-client-2.6.1-linux-arm64.tar.gz
2、解压并安装
amd64
$ cd /usr/local/src && tar xvzf influxdb2-client-2.6.1-linux-amd64.tar.gz -C /usr/local
$ cd .. && mv influxdb2-client-2.6.1-linux-amd64 influxdb2-client
$ echo 'export INFLUXDB_HOME=/usr/local/influxdb2-client/' >>/etc/profile
$ echo 'export PATH="$PATH:$INFLUXDB_HOME/bin"' >>/etc/profile
$ source /etc/profile
# (可选)将提取的influxd可执行二进制文件放入您的系统中$PATH
$ sudo cp influxdb2-client/influx /usr/local/bin/
arm
$ cd /usr/local/src && tar xvzf influxdb2-client-2.6.1-linux-arm64.tar.gz -C /usr/local
$ cd .. && mv influxdb2-client-2.6.1-linux-arm64 influxdb2-client
$ echo 'export INFLUXDB_HOME=/usr/local/influxdb2-client/' >>/etc/profile
$ echo 'export PATH="$PATH:$INFLUXDB_HOME/bin"' >>/etc/profile
$ source /etc/profile
# (可选)将提取的influxd可执行二进制文件放入您的系统中$PATH
$ sudo cp influxdb2-client/influx /usr/local/bin/
配置完成后命令行执行 influx 查看命令情况
[root@localhost local]# influx
NAME:
   influx - Influx Client

USAGE:
   influx [command]

HINT: If you are looking for the InfluxQL shell from 1.x, run "influx v1 shell"

COMMANDS:
   version              Print the influx CLI version
   write                Write points to InfluxDB
   bucket               Bucket management commands
   completion           Generates completion scripts
   query                Execute a Flux query
   config               Config management commands
   org, organization    Organization management commands
   delete               Delete points from InfluxDB
   user                 User management commands
   task                 Task management commands
   telegrafs            List Telegraf configuration(s). Subcommands manage Teleg                                                                                             raf configurations.
   dashboards           List Dashboard(s).
   export               Export existing resources as a template
   secret               Secret management commands
   v1                   InfluxDB v1 management commands
   auth, authorization  Authorization management commands
   apply                Apply a template to manage resources
   stacks               List stack(s) and associated templates. Subcommands mana                                                                                             ge stacks.
   template             Summarize the provided template
   bucket-schema        Bucket schema management commands
   scripts              Scripts management commands
   ping                 Check the InfluxDB /health endpoint
   setup                Setup instance with initial user, org, bucket
   backup               Backup database
   restore              Restores a backup directory to InfluxDB
   remote               Remote connection management commands
   replication          Replication stream management commands
   server-config        Display server config
   help, h              Shows a list of commands or help for one command

GLOBAL OPTIONS:
   --help, -h  show help
通过 UI 设置 InfluxDB
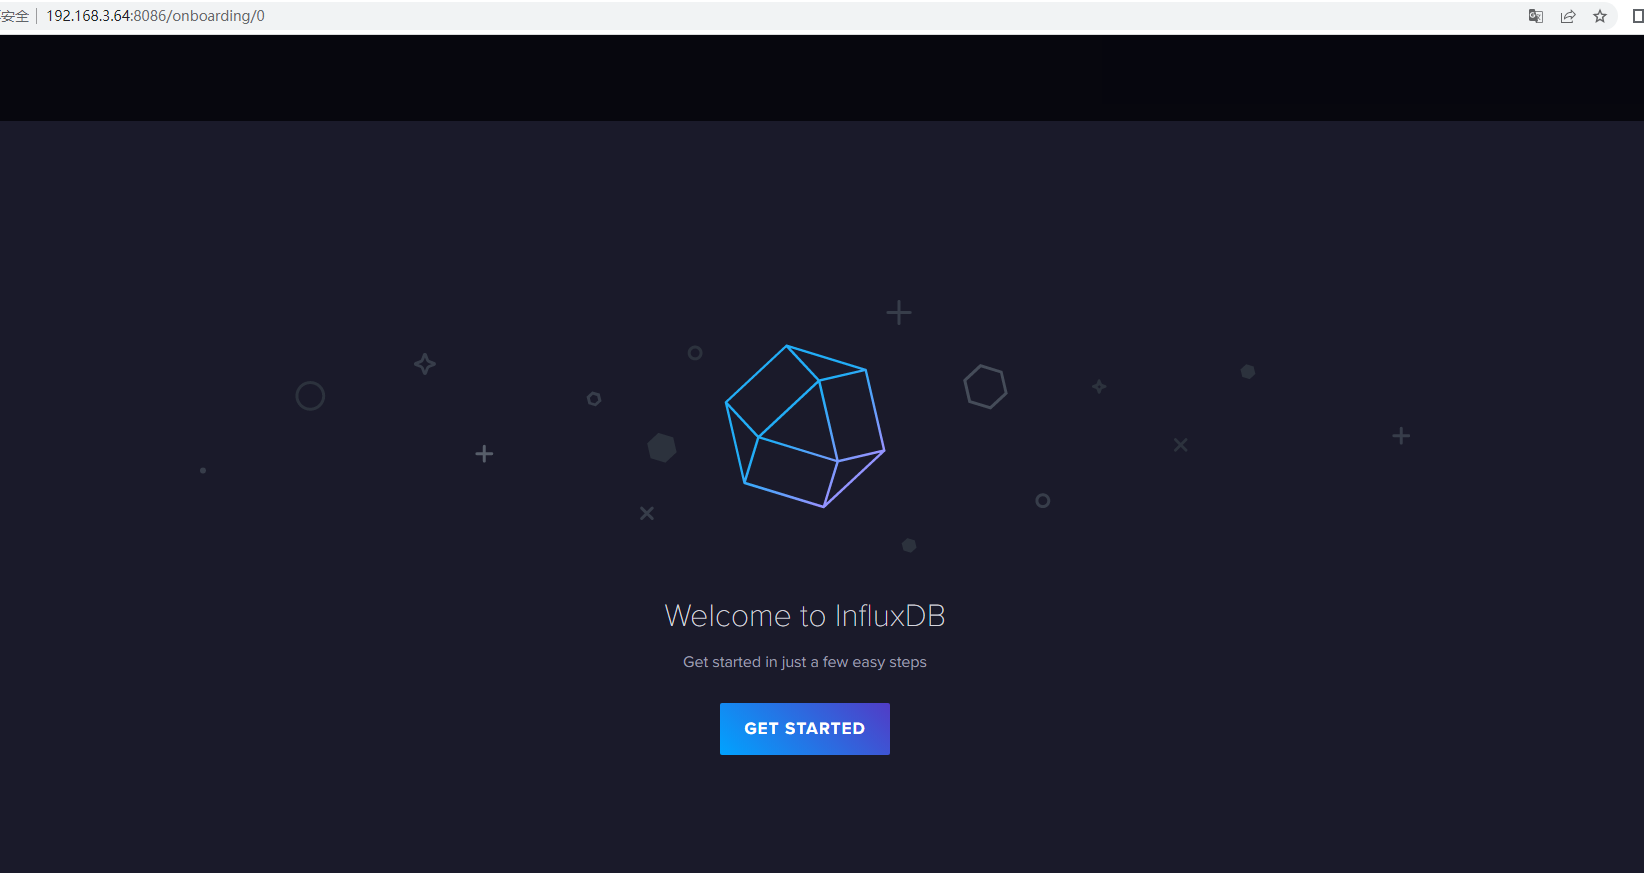
在 InfluxDB 运行的情况下,访问 http://localhost:8086
- 点击开始

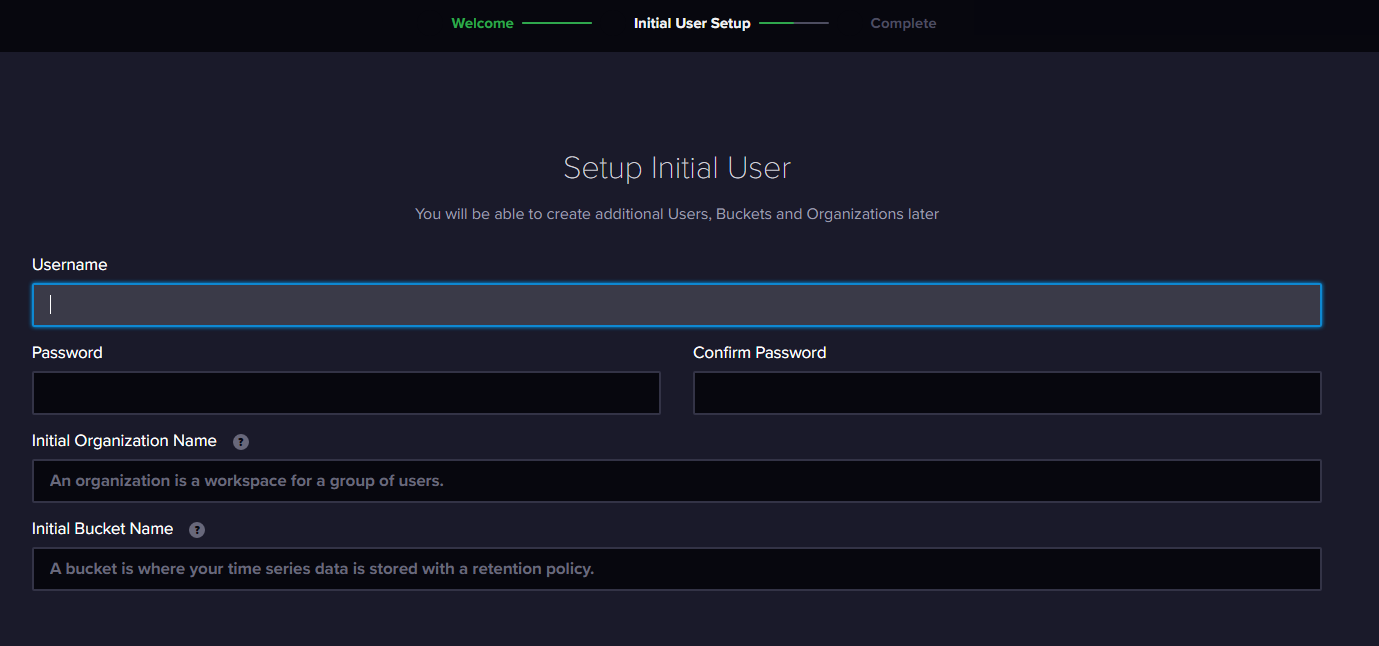
- 设置您的初始用户

- 输入初始用户的用户名。
- 为您的用户输入密码和确认密码。
- 输入您的初始组织名称。
- 输入您的初始Bucket Name。
- 单击继续。

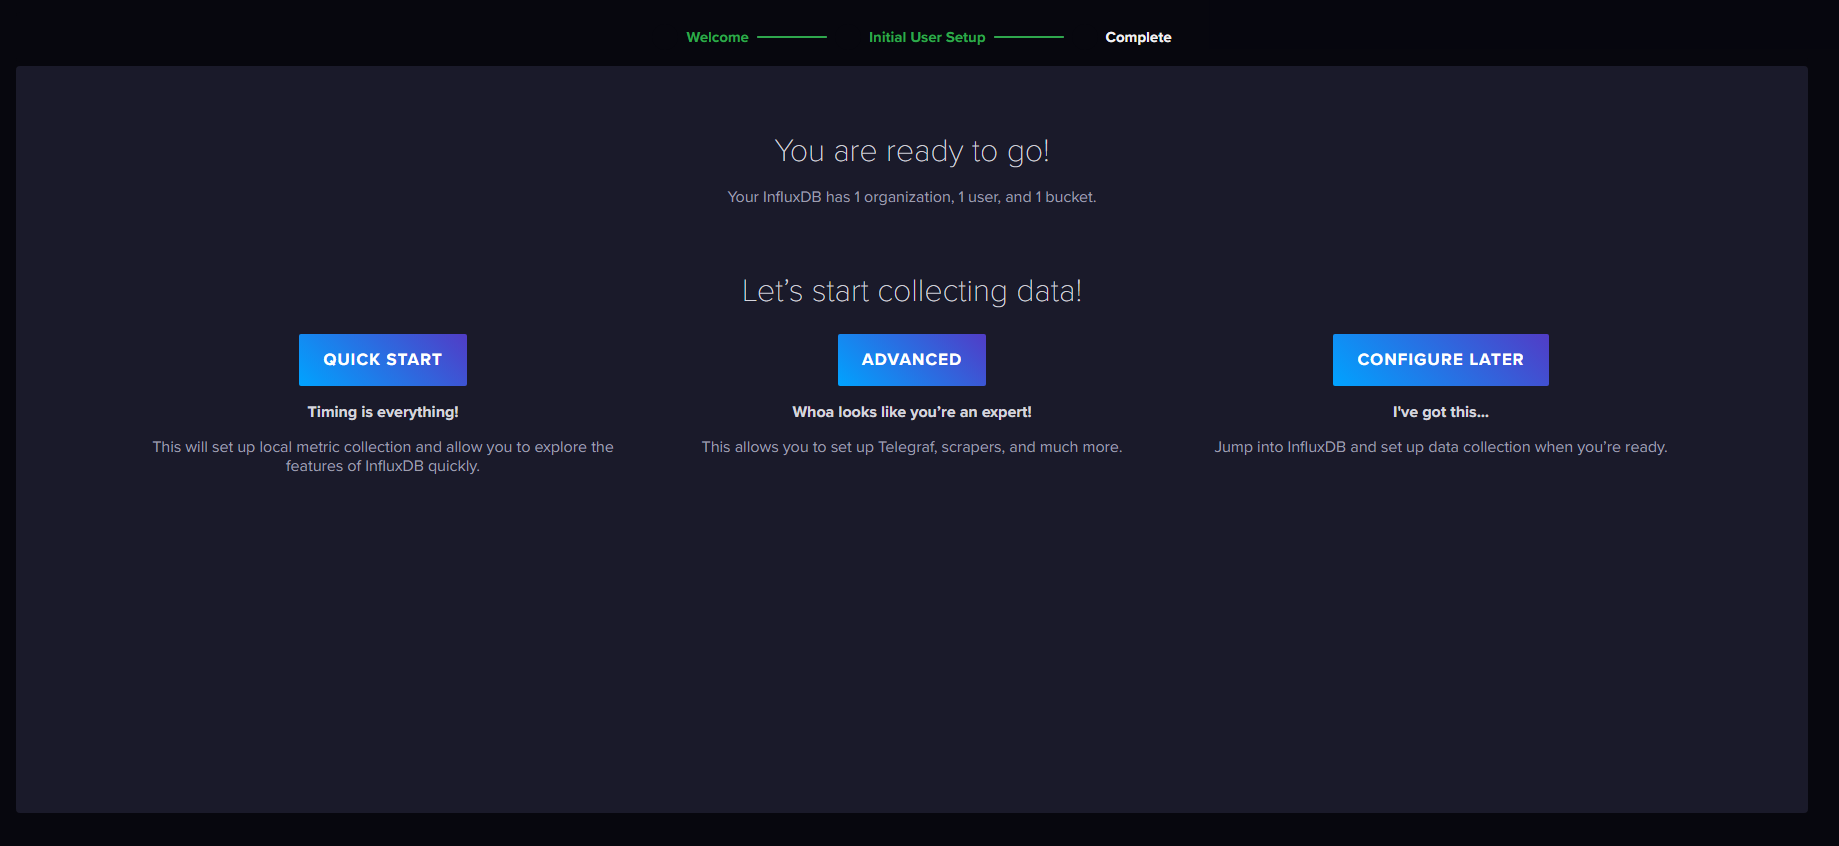
- 您的 InfluxDB 实例现已初始化。
Username : "influxdb"
Password : "SsFhNK6BQqhVCjg"
Initial Organization Name : test
Initial Bucket Name:telegraf
cSwrqv6ztcCEmTB7ETbvnGeG-hrRv58UAiuRY7tTQmhS_Y5l4ETWPxb-NZD5oden4rLDBt7u11dyvkgyJhuLvA==
最后编辑:Jeebiz 更新时间:2024-06-22 23:54
