安装环境准备
1、系统要求
| 最低要求 | |
|---|---|
| CPU | 支持 64 位的 Intel® 或 AMD 处理器*;2 GHz 或速度更快的处理器 |
| 内存 | 2 GB 或更大 RAM(推荐使用 4 GB) |
| 硬盘 | 需要 5GB 以上的可用磁盘空间 |
| 操作系统 | CentOS 7 或更高版本 |
2、软件要求
- Docker 18.09.9
二、系统设置
1、设置镜像源
因为国外镜像网速较慢,推荐设置阿里云镜像源:https://opsx.alibaba.com/mirror
1.1、备份
[root@nexus ~]# mv /etc/yum.repos.d/CentOS-Base.repo /etc/yum.repos.d/CentOS-Base.repo.backup1.2、下载新的CentOS-Base.repo 到/etc/yum.repos.d/
[root@nexus ~]# wget /etc/yum.repos.d/CentOS-Base.repo http://mirrors.aliyun.com/repo/Centos-7.repo或者
[root@nexus ~]# curl -o /etc/yum.repos.d/CentOS-Base.repo http://mirrors.aliyun.com/repo/Centos-7.repo1.3、之后运行yum makecache生成缓存
[root@docker]# sudo yum makecache all;1.4、执行yum update 更新系统组件到最新版本
[root@docker]# sudo yum update -y;2、配置静态IP
通常在/etc/sysconfig/network-scripts目录下都会有 ifcfg-eth0 格式文件,修改该文件内容:
[root@nexus ~]# vim /etc/sysconfig/network-scripts/ifcfg-eth0
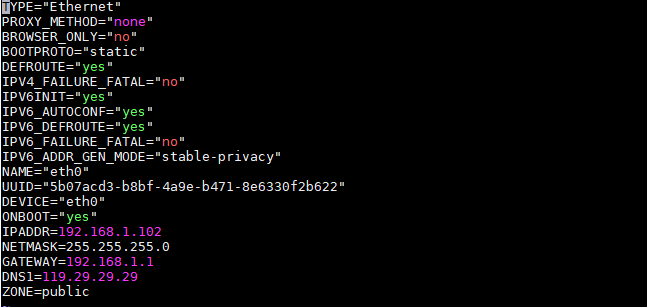
主要修改BOOTPROTO="static"、ONBOOT="yes",并增加 IPADDR、NETMASK、GATEWAY、DNS1。
TYPE="Ethernet"
PROXY_METHOD="none"
BROWSER_ONLY="no"
BOOTPROTO="static"
DEFROUTE="yes"
IPV4_FAILURE_FATAL="no"
IPV6INIT="yes"
IPV6_AUTOCONF="yes"
IPV6_DEFROUTE="yes"
IPV6_FAILURE_FATAL="no"
IPV6_ADDR_GEN_MODE="stable-privacy"
NAME="eth0"
UUID="5b07acd3-b8bf-4a9e-b471-8e6330f2b622"
DEVICE="eth0"
ONBOOT="yes"
IPADDR=192.168.1.102
NETMASK=255.255.255.0
GATEWAY=192.168.1.1
DNS1=119.29.29.29
ZONE=public
重启网卡
[root@nexus ~]# service network restart3、关闭防火墙
常用命令
[root@nexus]# systemctl start firewalld    启动
[root@nexus]# systemctl stop firewalld    关闭
[root@nexus]# systemctl status firewalld    查看状态
[root@nexus]# systemctl disable firewalld    开机禁用
[root@nexus]# systemctl enable firewalld    开机启用
4、系统优化
4.1、配置主机时间、时区、系统语言
查看时区
[root@rancher]# date -R 或者 timedatectl修改时区
[root@rancher]# ln -sf /usr/share/zoneinfo/Asia/Shanghai /etc/localtime修改系统语言环境
[root@rancher]# sudo echo 'LANG="en_US.UTF-8"' >> /etc/profile;source /etc/profile配置主机NTP时间同步
4.2、修改文件权限
vi /etc/security/limits.conf
# 在文件末尾追加
* soft nofile 655360
* hard nofile 655360
* soft nproc 655360
* hard nproc 655360
# 重启后配置生效
reboot
4.3、内存&并发数
vi /etc/sysctl.conf
# 配置文件后面追加
vm.max_map_count=655360
fs.file-max=655360
# 使配置生效
sysctl -p
4.4、 调整进程数
vi /etc/security/limits.d/20-nproc.conf
# 配置文件后面追加
*          soft    nproc     4096
root       soft    nproc     unlimited
4.5、Kernel 性能调优
通过如下命令进行宿主机内核性能调优,实际参数数值根据实际环境自行配置,最后执行
sysctl -p保存配置。
cat >> /etc/sysctl.conf<<EOF
vm.max_map_count = 6553000
vm.swappiness = 1
fs.file-max = 100000000
net.ipv6.conf.all.disable_ipv6 = 1
net.ipv6.conf.default.disable_ipv6 = 1
net.ipv4.neigh.default.gc_stale_time = 120
kernel.msgmnb = 65536
kernel.msgmax = 65536
net.ipv4.tcp_max_tw_buckets = 6000
net.ipv4.tcp_sack = 1
net.ipv4.tcp_window_scaling = 1
net.ipv4.tcp_rmem = 4096 87380 4194304
net.ipv4.tcp_wmem = 4096 16384 4194304
net.core.wmem_default = 8388608
net.core.rmem_default = 8388608
net.core.rmem_max = 16777216
net.core.wmem_max = 16777216
net.ipv4.tcp_max_orphans = 3276800
net.ipv4.tcp_max_syn_backlog = 262144
net.ipv4.tcp_timestamps = 0
net.ipv4.tcp_synack_retries = 1
net.ipv4.tcp_syn_retries = 1
net.ipv4.tcp_tw_recycle = 1
net.ipv4.tcp_mem = 94500000 915000000 927000000
net.ipv4.tcp_fin_timeout = 1
net.ipv4.ip_forward = 1
net.bridge.bridge-nf-call-iptables = 1
net.bridge.bridge-nf-call-ip6tables = 1
net.ipv4.neigh.default.gc_thresh1 = 4096
net.ipv4.neigh.default.gc_thresh2 = 6144
net.ipv4.neigh.default.gc_thresh3 = 8192
EOF
然后重新加载 sysctl.conf 即可
$ sudo sysctl -p作者:Jeebiz 创建时间:2023-02-12 01:30
最后编辑:Jeebiz 更新时间:2025-12-10 15:39
最后编辑:Jeebiz 更新时间:2025-12-10 15:39
